A hole in your leather car seat can be frustrating and make your vehicle look worn out. Luckily you don’t have to replace the entire seat or spend a fortune on professional repairs. With the right tools and a little patience you can fix that hole yourself and restore your car’s interior to its former glory.
Whether it’s a small puncture or a larger tear you’ll find simple methods to patch up the damage and keep your leather looking smooth and durable. Taking care of the problem early not only improves appearance but also prevents further wear and costly repairs down the road. Let’s dive into easy steps that help you fix a hole in your leather car seat quickly and effectively.
Assessing the Damage on Your Leather Car Seat
Start by closely inspecting your leather car seat to understand the extent of the damage before proceeding with repairs. Accurate assessment guides the choice of repair method and materials.
Identifying the Size and Type of the Hole
Measure the hole’s dimensions using a ruler or measuring tape. Classify the damage as a puncture, tear, or worn-out spot. Small punctures under 1 inch usually require simple plug repairs, while tears larger than 2 inches need patching or professional-grade kits. Note if the hole has jagged edges or smooth cuts, as this affects the repair technique.
Checking for Underlying Damage
Examine the leather around the hole for discoloration, cracking, or peeling that may signal deeper material breakdown. Press gently near the damaged area to detect weakened foam or padding underneath. If the underlying cushioning is compressed or deteriorated, address it before patching the leather to ensure durability and a smooth finish.
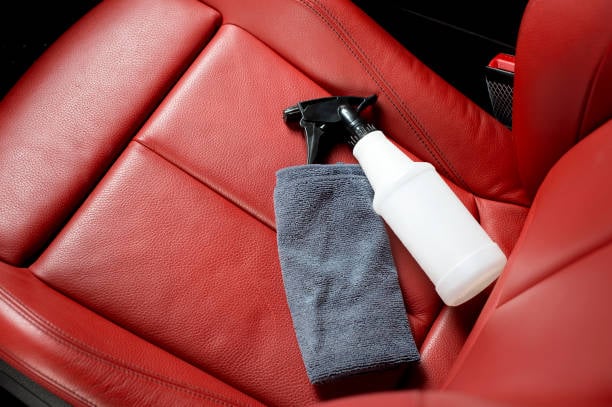
Gathering the Necessary Repair Materials
Collecting the right materials makes fixing a hole in your leather car seat more efficient and ensures a lasting repair. Focus on tools and products that match the damage type and leather condition.
Essential Tools and Products
Prepare these basics to tackle most leather seat repairs:
- Leather cleaner for removing dirt and oils
- Fine sandpaper or leather prep pad to smooth edges
- Fabric or leather patch for backing larger holes
- Leather adhesive or contact cement for bonding
- Leather filler to rebuild torn areas
- Palette knife or small spatula for applying filler
- Color-matching leather dye or repair compound
- Soft cloth and sponge for cleaning and blending
- Protective gloves to keep hands clean and avoid contamination
Having these ready helps maintain control during each repair step and improves the final outcome.
Choosing the Right Leather Repair Kit
Select a repair kit based on your hole size and leather type. Kits vary by contents and intended uses:
- Kits for small punctures typically include filler, adhesive, and color agents
- Kits designed for larger tears contain patches, backing fabric, and stronger adhesives
- Premium kits offer multiple dyes, texture pads, and finishing sprays for seamless results
- Confirm the kit suits your leather color and finish—smooth versus textured leather requires different products
Using a kit tailored to your damage and leather type simplifies the process and maximizes repair quality.
Step-by-Step Guide to Fixing the Hole
Follow these steps carefully to repair the hole in your leather car seat effectively. Each stage ensures a durable and visually appealing result.
Cleaning and Preparing the Area
Remove dirt and oils by cleaning the damaged area with a leather cleaner. Allow the surface to dry completely before proceeding. Lightly sand around the hole with fine-grit sandpaper to create a smooth, even surface. Avoid sanding beyond the damaged zone to preserve the surrounding leather. Remove all dust particles using a soft cloth or brush to ensure proper adhesion of repair materials.
Applying the Leather Patch or Filler
Cut a leather patch slightly larger than the hole if using a patch. Position the patch beneath the hole to support the repair, securing it with a suitable leather adhesive. For smaller holes, apply a leather filler directly into the damaged area using a spatula or applicator. Spread the filler evenly, filling the hole flush with the surrounding leather. Allow the adhesive or filler to dry according to the product instructions, often 30 minutes to an hour. Apply additional filler layers if necessary, sanding lightly between coats to maintain an even surface.
Blending and Coloring for a Seamless Finish
Select a color-matching leather dye or repair kit to restore the seat’s original hue. Apply the dye in thin layers using a sponge or brush, blending the repaired area with the surrounding leather. Let each coat dry fully before applying the next to avoid streaks or uneven color. Use a leather finish or sealant to protect the repair and give it a natural sheen. Allow the sealant to dry completely before using the seat. Regularly condition the leather afterward to maintain flexibility and prevent future damage.
Tips for Maintaining Repaired Leather Seats
Maintaining repaired leather seats extends the life of your investment and keeps your car’s interior looking polished. Applying consistent care preserves the integrity of your repairs and prevents new damage from forming.
Preventative Care to Avoid Future Damage
Limit exposure to direct sunlight, since UV rays cause leather to fade and crack. Use sunshades or park in shaded areas when possible. Avoid sharp objects or heavy items that could puncture or strain the leather surface. Place seat covers during activities that risk stains or scratches, especially when transporting pets or tools. Maintain stable interior humidity; too much dryness leads to leather brittleness, while excess moisture encourages mold growth. Address spills instantly by blotting with a clean cloth; letting liquids sit increases deterioration risk.
Regular Cleaning and Conditioning
Clean your leather seats monthly using pH-balanced leather cleaners to remove dirt and oils without stripping natural moisture. Avoid household cleaners, which may harm leather finish. After cleaning, apply a quality leather conditioner every 3 to 6 months to restore suppleness. Focus on repaired areas to keep fillers and patches flexible, reducing the chance of cracking. Buff seats with a microfiber cloth for even absorption and shine. This routine supports a uniform appearance and sustains your repairs over time.
When to Seek Professional Help
Recognize the limits of DIY leather car seat repairs by evaluating the damage severity. Opt for professional help if the hole exceeds 3 inches in length, since large tears require specialized tools and techniques to restore structural integrity. Consider expert services when the leather has deep cracks or extensive discoloration beyond surface damage, as these signs indicate underlying leather degradation that simple patches can’t fix.
Avoid attempting repairs if the seat cushion beneath the leather feels uneven or compromised, because padding damage affects comfort and support, demanding comprehensive restoration. Choose professionals if previous DIY repairs failed to hold or look uneven, ensuring a seamless finish and lasting durability. Contact a leather repair specialist whenever you encounter complex patterns, such as perforated leather or custom stitching, since improper repair risks voiding warranties and devaluing the vehicle.
Your car’s interior value depends on maintaining premium leather conditions, so prioritize professional intervention when unsure about repair techniques or products. Scheduling professional inspection guarantees assessment accuracy and tailored restoration, preventing further damage and costlier replacements over time.
Conclusion
Fixing a hole in your leather car seat doesn’t have to be overwhelming or expensive. With the right approach and materials, you can restore your seat’s look and protect it from further damage. Taking care of repairs promptly helps maintain your car’s interior value and comfort.
Remember to choose the repair method that fits the size and type of damage and don’t hesitate to seek professional help if the damage is extensive. Regular maintenance after repair will keep your leather seats looking smooth and durable for years to come. You’ve got this!

Certification: BSc in Mechanical Engineering
Education: Mechanical engineer
Lives In: 539 W Commerce St, Dallas, TX 75208, USA
Md Amir is an auto mechanic student and writer with over half a decade of experience in the automotive field. He has worked with top automotive brands such as Lexus, Quantum, and also owns two automotive blogs autocarneed.com and taxiwiz.com.